The Great Digital Diet: Hosting 20k Photos for Free on OCI
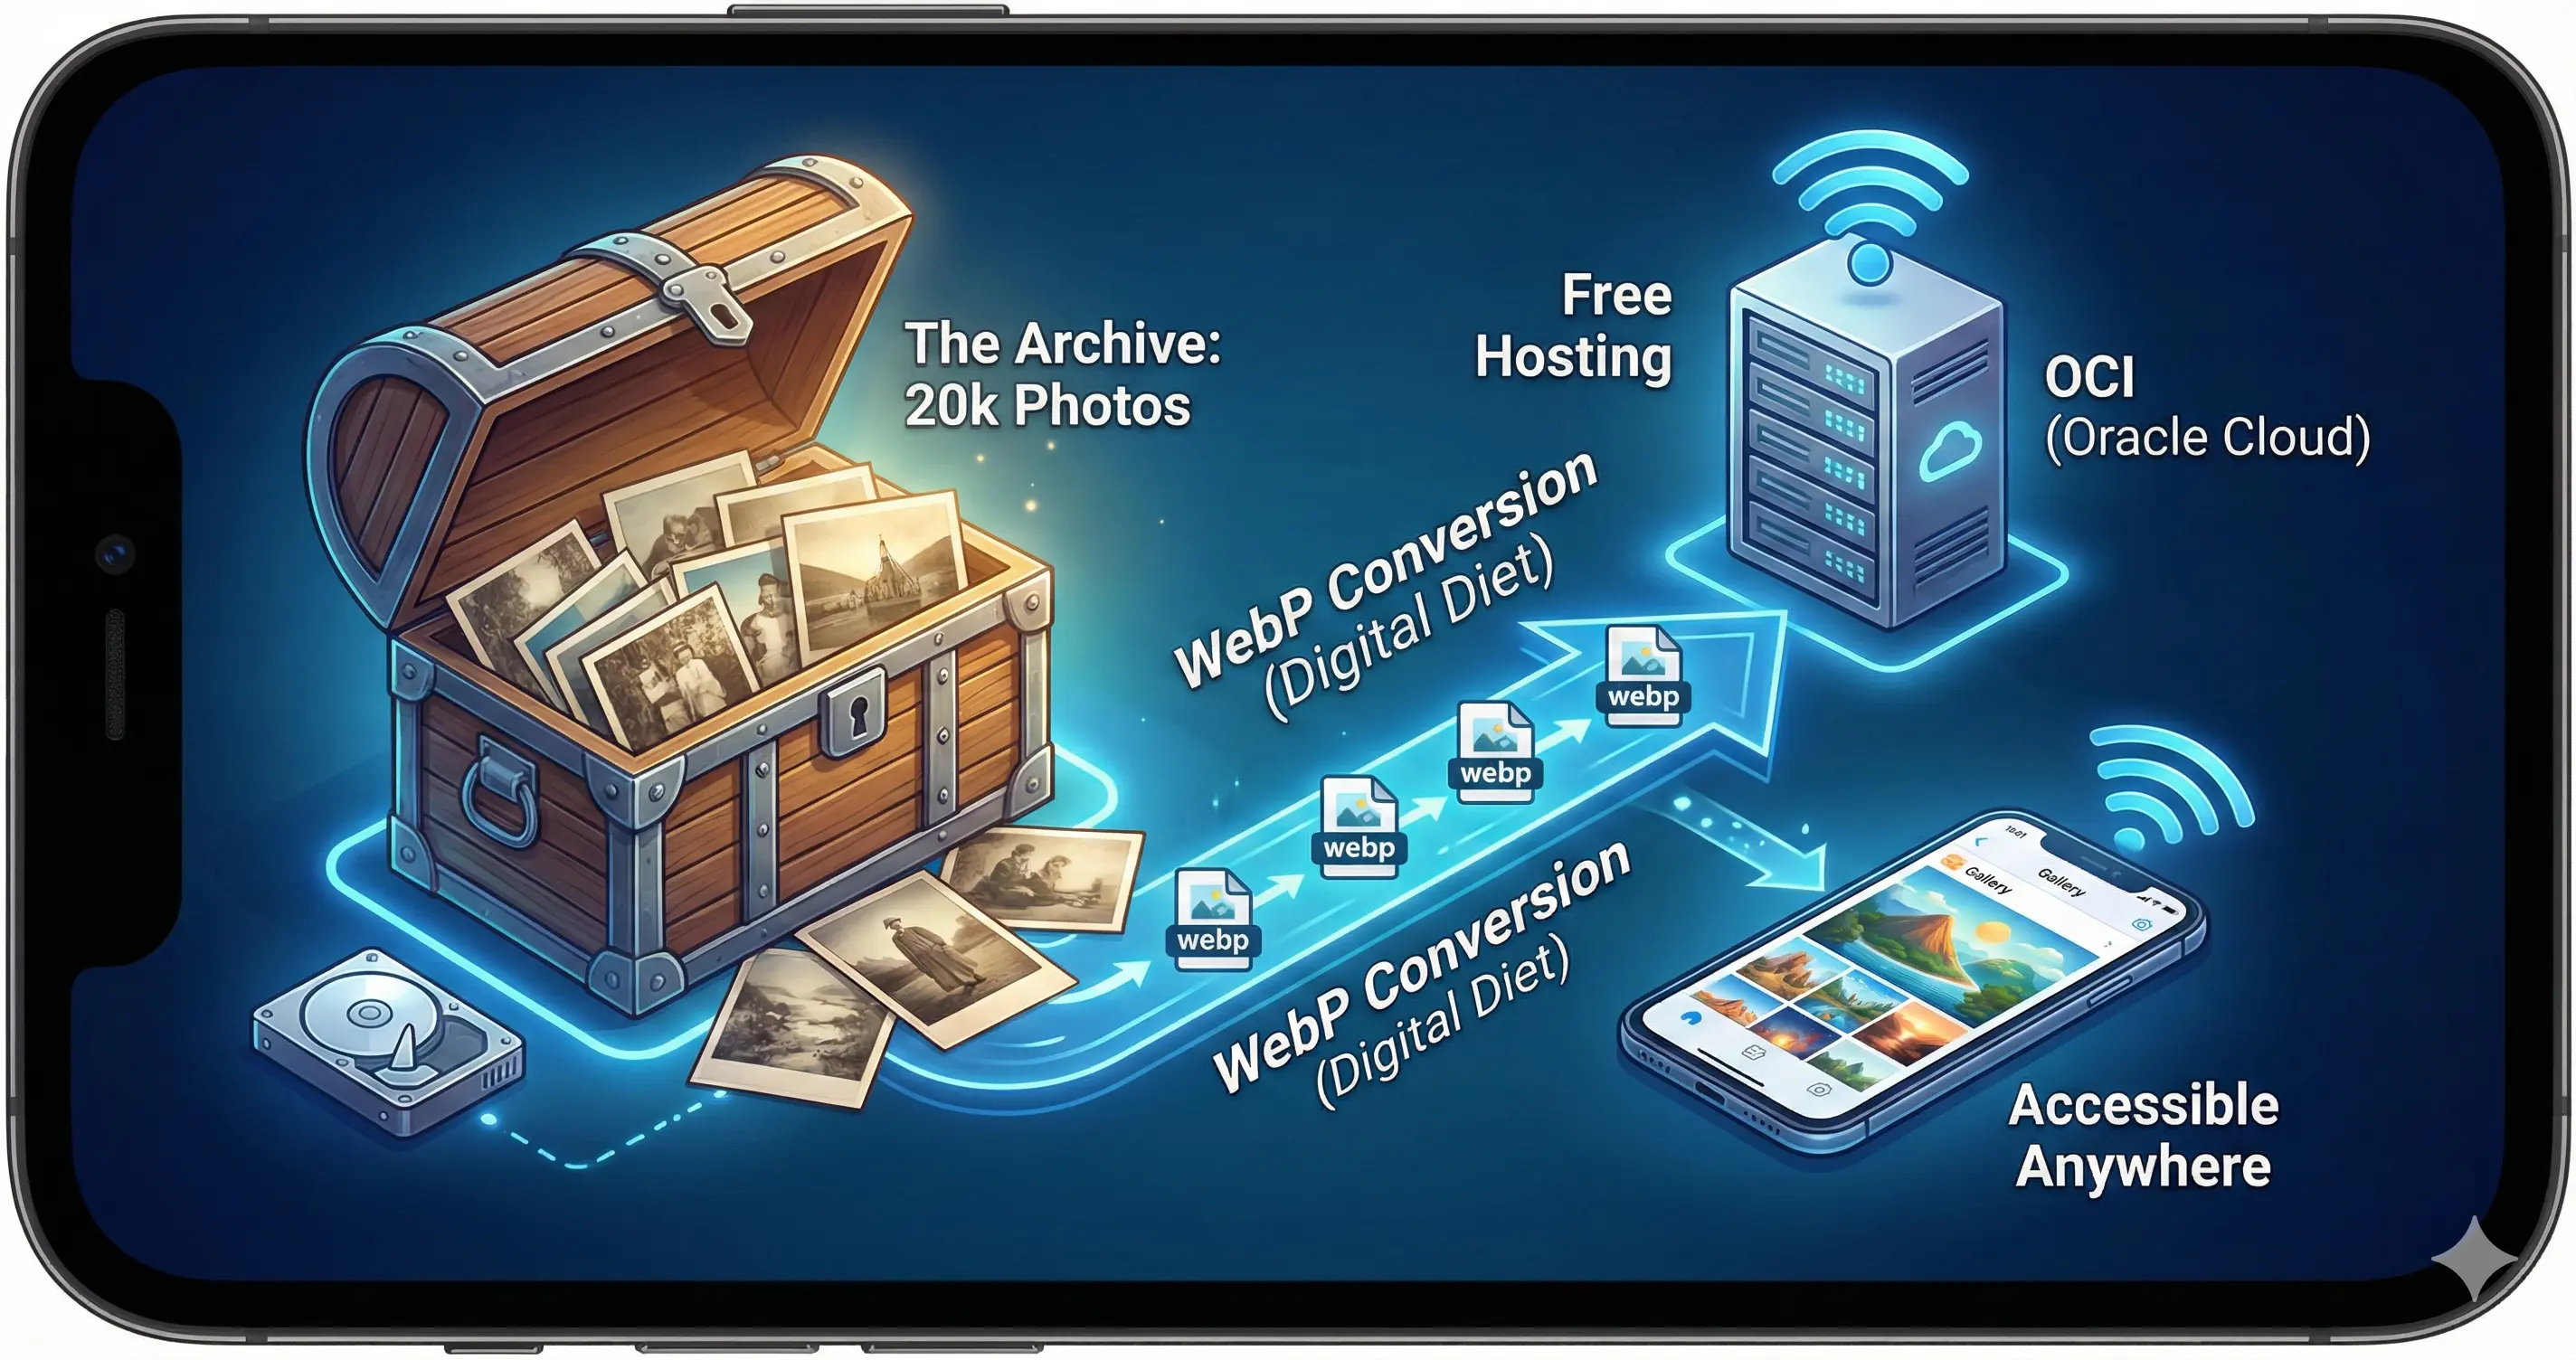
We all have “The Archive.” Mine is a digital hoard of 20,000 photos—family birthdays, office parties, and enough ship spotting photos to classify as a maritime obsession.
It currently sits on a hard drive, weighing in at a hefty 100GB. It’s heavy, it’s slow, and it’s gathering digital dust. I wanted these memories accessible on my phone—like Google Photos, but free, private, and without a tech giant scanning my face to sell me ads.
The plan? Host it on Oracle Cloud (OCI) using their “Always Free” tier (4 OCPUs, 24GB RAM). It’s a beast of a free tier, but even beasts have limits. Uploading 100GB takes forever, and serving massive raw files burns bandwidth like a Hummer burns gas.
So, we are going to put this library on a serious diet.
Here is the guide to shedding gigabytes, mirroring your library, and hosting it behind a “Digital Iron Dome.”
Phase 1: The Keto Diet (WebP Mirroring)
We aren’t going to delete your high-res masters (we aren’t monsters). Instead, we are going to create a “Mirror” folder. Think of it as the “Instagram Body” version of your library.
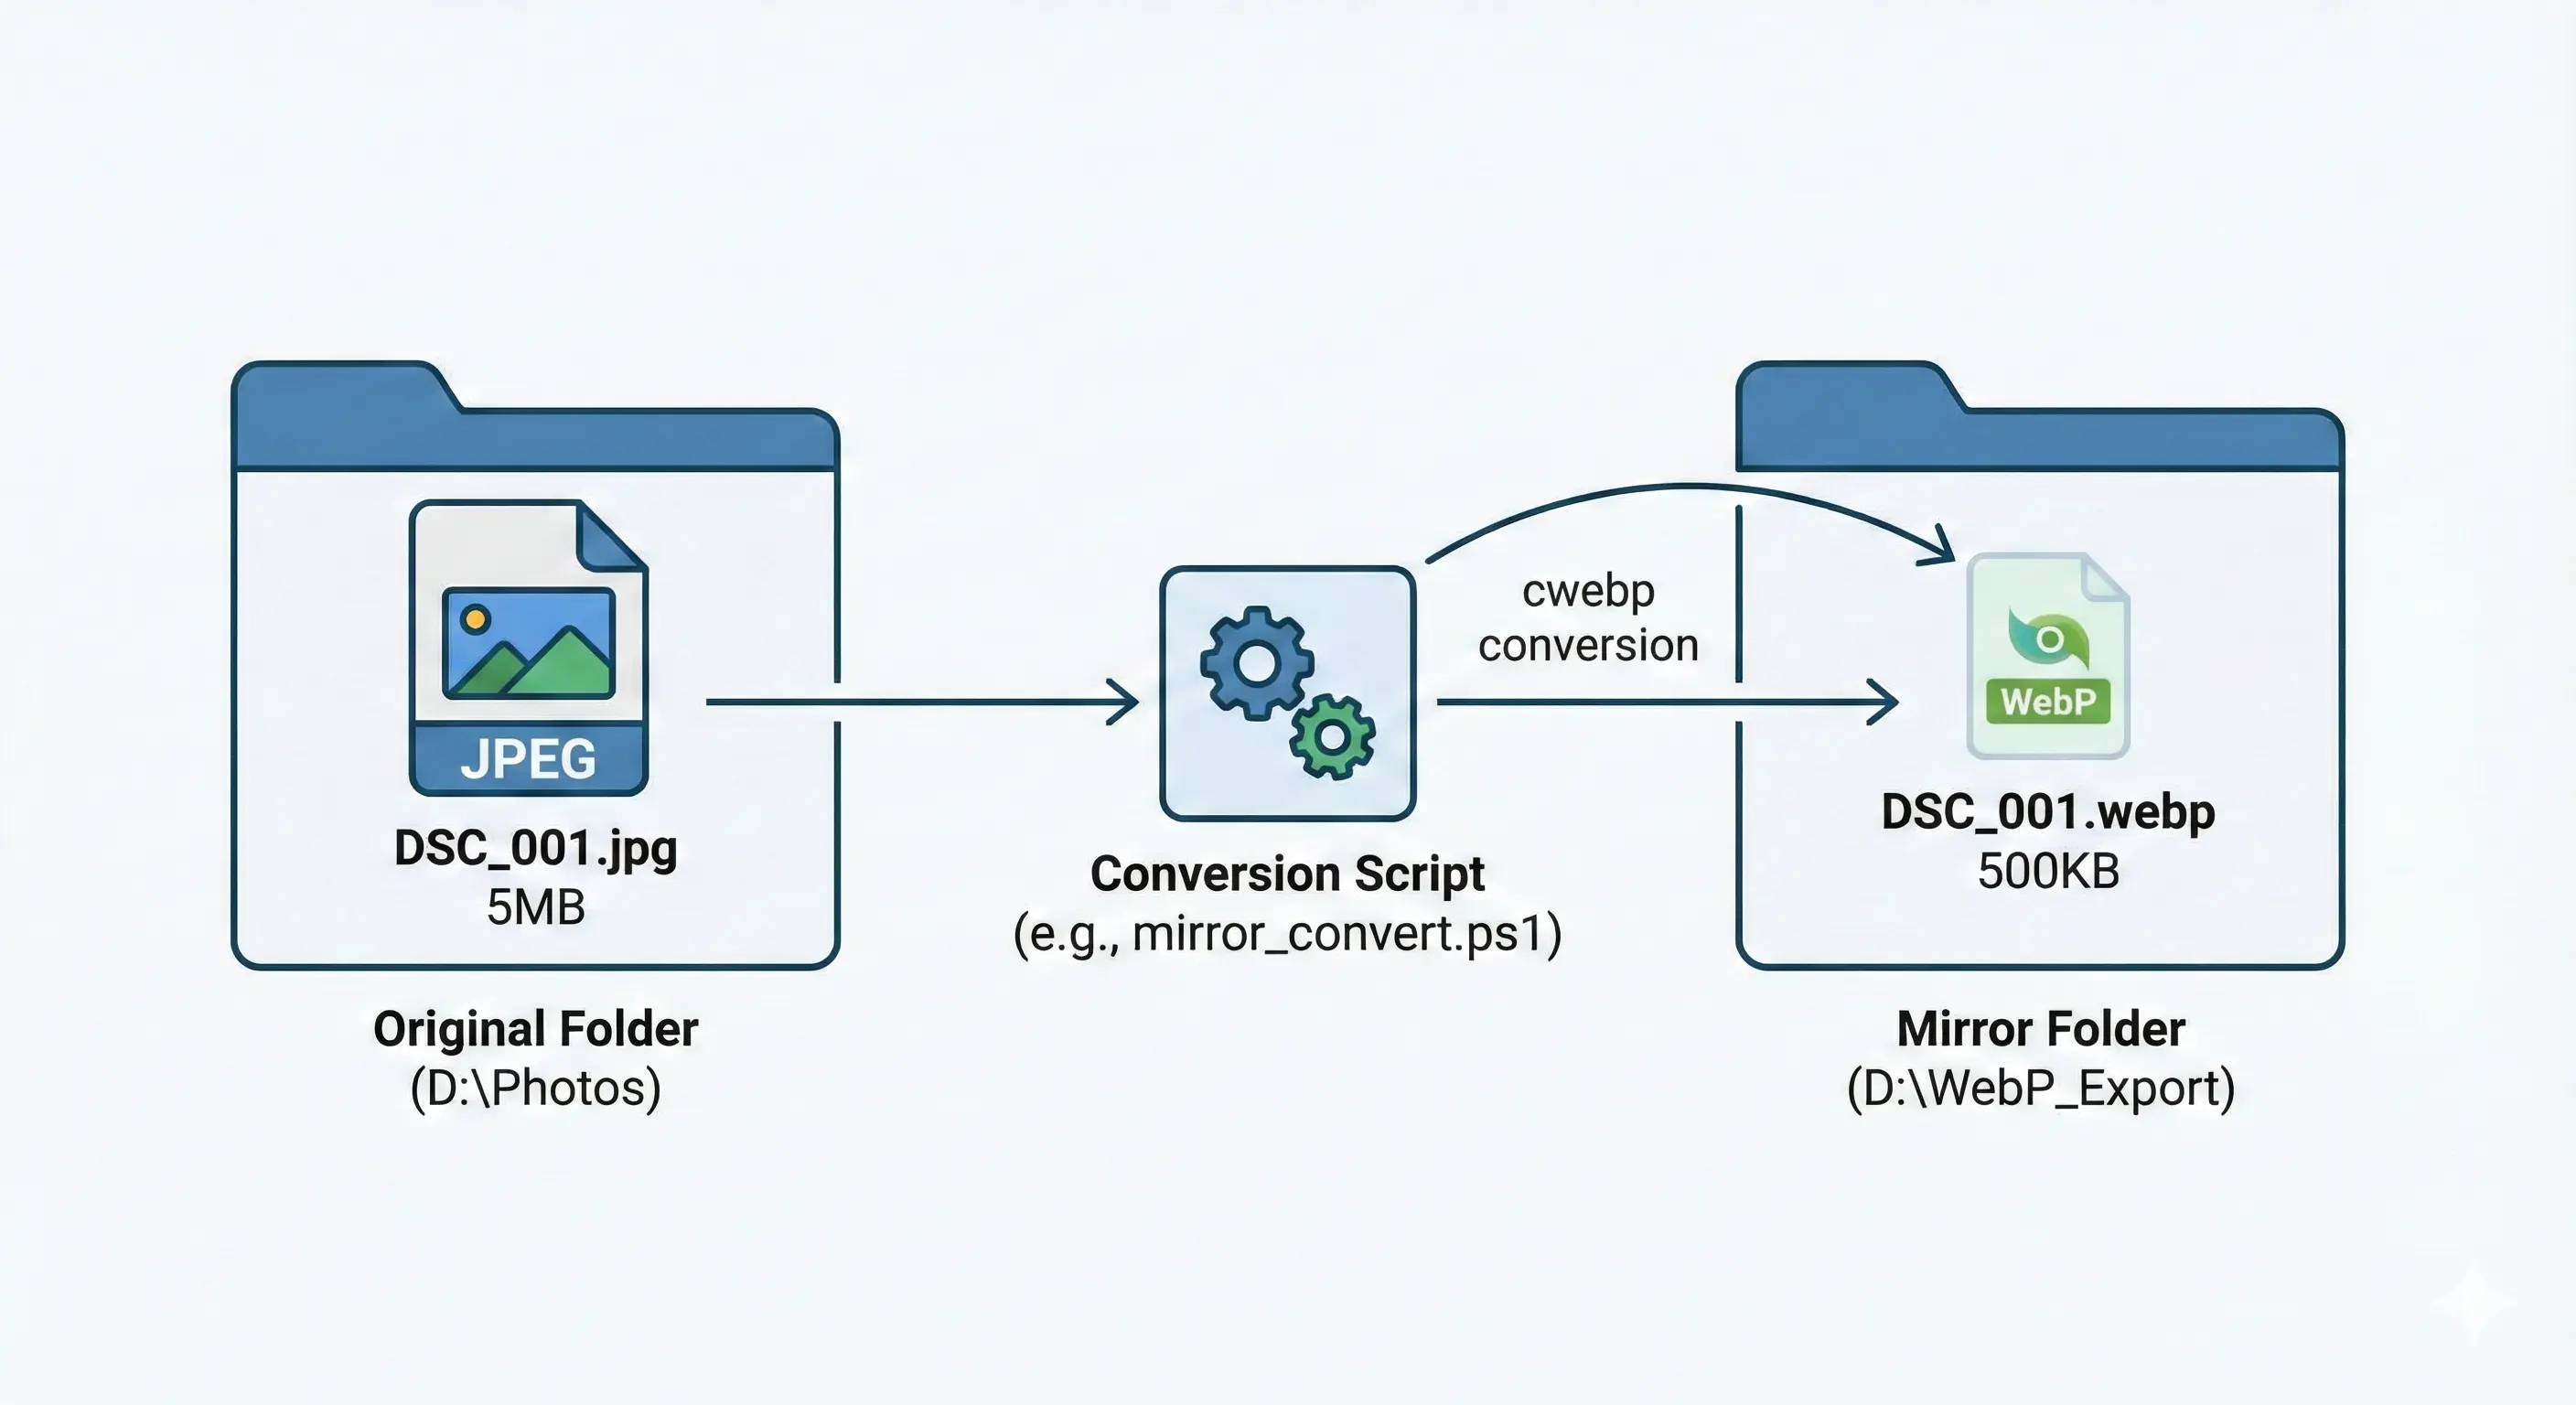
- Original:
D:\Photos\2025_Xmas\DSC_001.jpg(5MB, heavy, slow) - Mirror:
D:\WebP_Export\2025_Xmas\DSC_001.webp(500KB, lean, fast)
We will only upload the Mirror. The originals stay home safe.
The Personal Trainer (PowerShell Script)
This script forces your images to do cardio. It recursively finds every photo and creates a lightweight WebP twin in the export folder.
Prerequisite: Download libwebp and add it to your PATH.
Save this as mirror_convert.ps1:
1
2
3
4
5
6
7
8
9
10
11
12
13
14
15
16
17
18
19
20
21
22
23
24
25
26
27
# mirror_convert.ps1
$SourceRoot = "D:\Photos"         # The heavy stuff
$DestRoot   = "D:\WebP_Export"    # The lean stuff

$images = Get-ChildItem -Path $SourceRoot -Recurse -Include *.jpg, *.jpeg, *.png
$total = $images.Count
$count = 0

ForEach ($img in $images) {
    $count++
    # Calculate the new path (Mirror logic)
    $relativePath = $img.FullName.Substring($SourceRoot.Length)
    $destFile = Join-Path $DestRoot $relativePath
    $destFile = [IO.Path]::ChangeExtension($destFile, ".webp")
    $destFolder = [IO.Path]::GetDirectoryName($destFile)

    # Create the folder if it's missing
    if (-not (Test-Path $destFolder)) {
        New-Item -ItemType Directory -Path $destFolder -Force | Out-Null
    }

    # If the gym session hasn't happened yet, convert it!
    if (-not (Test-Path $destFile)) {
        Write-Host "[$count / $total] Shedding weight: $($img.Name)" -ForegroundColor Cyan
        cwebp -q 80 "$($img.FullName)" -o "$destFile" -mt -quiet
    }
}
Phase 2: The “Lazy Button” (Automated Sync)
I don’t like typing commands. I like double-clicking things. Let’s create a script that runs the diet program AND uploads the results to the cloud in one go.
Windows: The “Sync-It-All.bat”
Download immich-go.exe and put it next to this script.
1
2
3
4
5
6
7
8
9
10
11
12
13
14
15
16
17
18
19
20
21
22
23
24
25
26
27
@echo off
TITLE Immich Digital Diet Sync
COLOR 0A

echo.
echo ==================================================
echo      STEP 1: HITTING THE GYM (CONVERSION)
echo ==================================================
PowerShell -NoProfile -ExecutionPolicy Bypass -File "mirror_convert.ps1"

echo.
echo ==================================================
echo      STEP 2: UPLOADING THE RESULTS
echo ==================================================
:: We use immich-go because it's fast and smart.
:: It creates albums from your folder names automatically.
immich-go.exe upload from-folder "D:\WebP_Export" ^
  --server [https://photos.sanchez.ph](https://photos.sanchez.ph) ^
  --key YOUR_API_KEY_HERE ^
  --recursive ^
  --create-albums

echo.
echo ==================================================
echo      WORKOUT COMPLETE.
echo ==================================================
pause
Linux: The “Sync-It-All.sh” (For the Penguin Lovers)
1
2
3
4
5
6
7
8
9
10
11
12
13
14
15
16
17
18
19
20
21
22
23
24
25
26
27
28
29
#!/bin/bash
# sync.sh

SOURCE="/mnt/data/Photos"
DEST="/mnt/data/WebP_Export"
API_KEY="YOUR_API_KEY_HERE"
SERVER="[https://photos.sanchez.ph](https://photos.sanchez.ph)"

echo ">> Step 1: Compressing Images..."
find "$SOURCE" -type f \( -iname "*.jpg" -o -iname "*.png" \) | while read FILE; do
    REL_PATH="${FILE#$SOURCE}"
    DEST_FILE="$DEST${REL_PATH%.*}.webp"
    DEST_FOLDER=$(dirname "$DEST_FILE")

    if [ ! -f "$DEST_FILE" ]; then
        mkdir -p "$DEST_FOLDER"
        echo " shrinking: $REL_PATH"
        cwebp -q 80 "$FILE" -o "$DEST_FILE" -quiet
    fi
done

echo ">> Step 2: Uploading..."
./immich-go upload from-folder "$DEST" \
  --server "$SERVER" \
  --key "$API_KEY" \
  --recursive \
  --create-albums

echo ">> Done."
Phase 3: The Cloud Beast (OCI + Docker)
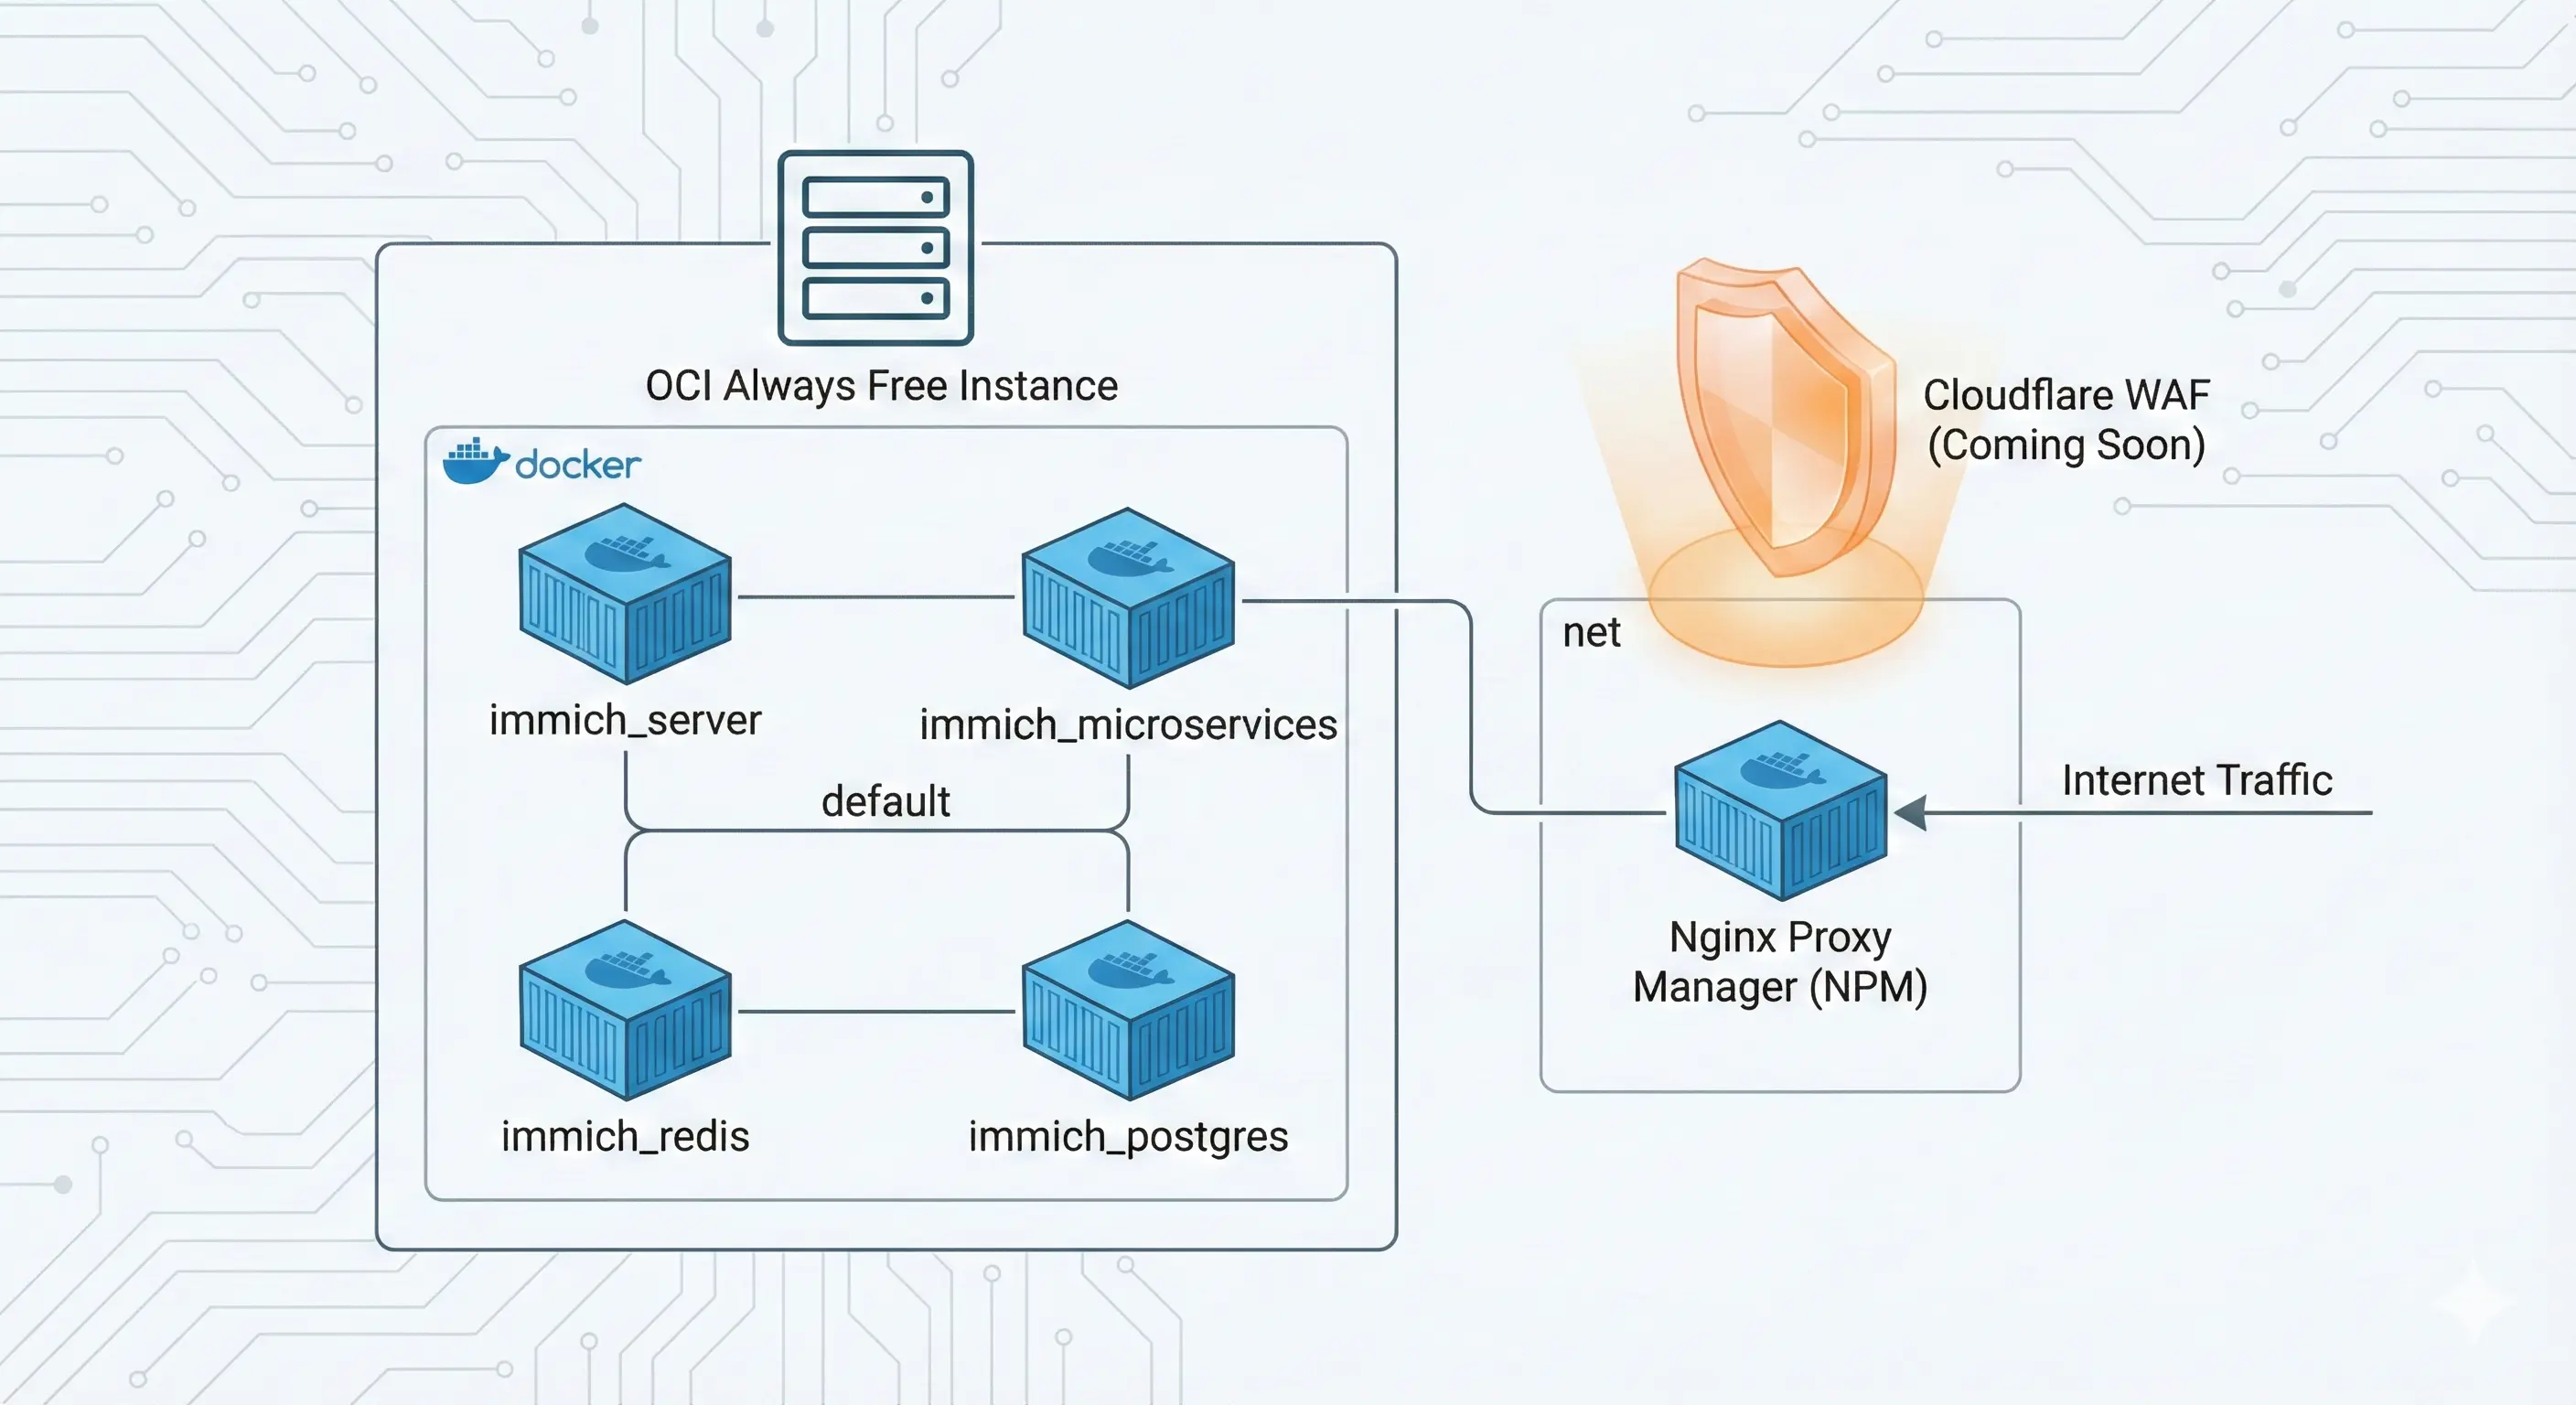
Now we set up the home for our fit, lightweight photos. We are using Oracle Cloud.
The Setup:
- Network: We have an existing Docker network named
netwhere Nginx Proxy Manager (NPM) lives. - Goal: Immich needs to join this network party.
Create docker-compose.yml in your immich-app folder:
1
2
3
4
5
6
7
8
9
10
11
12
13
14
15
16
17
18
19
20
21
22
23
24
25
26
27
28
29
30
31
32
33
34
35
36
37
38
39
40
41
42
43
44
45
46
47
48
49
50
51
52
53
54
55
56
57
58
59
60
61
62
63
64
65
66
67
68
69
70
71
72
73
74
75
76
77
78
79
80
81
82
83
84
85
86
87
88
89
90
91
92
93
name: immich

services:
  immich-server:
    container_name: immich_server
    image: ghcr.io/immich-app/immich-server:${IMMICH_VERSION:-release}
    command: ["start.sh", "immich"]
    volumes:
      - ${UPLOAD_LOCATION}:/usr/src/app/upload
      - /etc/localtime:/etc/localtime:ro
    env_file:
      - .env
    ports:
      # Optional: Only needed if you want direct IP access.
      # Since we use NPM via the 'net' network, you can comment this out to be safer.
      - 2283:3001
    depends_on:
      - redis
      - database
    networks:
      - net       # Public facing (Nginx Proxy Manager)
      - default   # Internal (Database/Redis)
    restart: always

  immich-microservices:
    container_name: immich_microservices
    image: ghcr.io/immich-app/immich-server:${IMMICH_VERSION:-release}
    # extends: # Uncomment this section for Hardware Acceleration if supported
    #   file: hwaccel.transcoding.yml
    #   service: cpu-transcoding
    command: ["start.sh", "microservices"]
    volumes:
      - ${UPLOAD_LOCATION}:/usr/src/app/upload
      - /etc/localtime:/etc/localtime:ro
    env_file:
      - .env
    depends_on:
      - redis
      - database
    networks:
      - default
    restart: always

  immich-machine-learning:
    container_name: immich_machine_learning
    # For OCI Ampere (ARM64), this tag works automatically.
    image: ghcr.io/immich-app/immich-machine-learning:${IMMICH_VERSION:-release}
    # extends: # Uncomment for Hardware Acceleration
    #   file: hwaccel.ml.yml
    #   service: cpu-ml
    volumes:
      - model-cache:/cache
    env_file:
      - .env
    networks:
      - default
    restart: always

  redis:
    container_name: immich_redis
    image: redis:6.2-alpine@sha256:d6c2911ac51b289db208767581a5d154544f2b2fe99309c7af963a1297791cd6
    healthcheck:
      test: redis-cli ping || exit 1
    networks:
      - default
    restart: always

  database:
    container_name: immich_postgres
    image: tensorchord/pgvecto-rs:pg14-v0.2.0@sha256:90724186f0a3517cf6914295b5ab410db9ce23190a2d9d0b9dd6463e3fa298f0
    environment:
      POSTGRES_PASSWORD: ${DB_PASSWORD}
      POSTGRES_USER: ${DB_USERNAME}
      POSTGRES_DB: ${DB_DATABASE_NAME}
      POSTGRES_INITDB_ARGS: '--data-checksums'
    volumes:
      - ${DB_DATA_LOCATION}:/var/lib/postgresql/data
    healthcheck:
      test: pg_isready --dbname='${DB_DATABASE_NAME}' --username='${DB_USERNAME}' || exit 1; Chksum="$$(psql --dbname='${DB_DATABASE_NAME}' --username='${DB_USERNAME}' --tuples-only --no-align --command='SELECT COALESCE(SUM(checksum_failures), 0) FROM pg_stat_database')"; echo "checksum failure count is $$Chksum"; [ "$$Chksum" = '0' ] || exit 1
      interval: 5m
      start_period: 5m
      timeout: 5s
      retries: 3
    networks:
      - default
    restart: always

volumes:
  model-cache:

networks:
  net:
    external: true
NPM Config: Point photos.sanchez.ph to immich_server on port 2283. Done.
Phase 4: The Iron Dome (Cloudflare WAF)

This is a private gallery. I don’t need random bots from halfway across the world trying to guess my password.
- Open Cloudflare Dashboard -> Security -> WAF.
- Create a rule named “Philippines or Bust”.
- Expression:
Country does not equal Philippines. - Action:
Block.
Now, if a hacker tries to access your site from outside the country, they get a door slammed in their face. Secure.
Phase 5: The Bulk Import (immich-go)
Do not drag-and-drop 20,000 photos into the web browser. It will crash.
We will use immich-go, a specialized tool that uploads massive libraries and—crucially—creates albums automatically from your folder names.
- Get API Key: In Immich Web -> Account Settings -> API Keys.
- Download immich-go: Get the release for your OS.
- Run the command (or the sync script from Phase 2).
It acts like a sync tool, skipping files that are already there and organizing everything perfectly.
Phase 6: Tuning (Don’t Crash the Beast)
Even with 24GB RAM, if you throw 20,000 photos at the AI facial recognition all at once, the server will cry. And if you are browsing from your phone, you don’t want your server to have to re-send the same thumbnail 50 times.
1. The “Infinite Cache” (Cloudflare)
We will use Cloudflare as our “digital backpack.” It will hold onto the heavy images so your OCI server doesn’t have to carry the weight.
- Log in to Cloudflare Dashboard -> Caching -> Cache Rules.
- Click Create rule. Name it
Immich Heavy Assets. - Under “When incoming requests match”:
- Field:
URL Path-> Operator:contains-> Value:/api/assets/ - AND
- Field:
URL Path-> Operator:contains-> Value:/thumbnail
- Field:
- Under “Then settings”:
- Cache eligibility:
Eligible for cache. - Edge Cache TTL:
Ignore cache-control headerand set it to 1 Month.
- Cache eligibility:
- Click Deploy.
Now, Cloudflare serves the tiny images, and your OCI instance barely notices you scrolling.
2. Taming the AI (Limit Concurrency)
- Go to Immich Web -> Administration -> Settings -> Job Settings.
- Machine Learning Concurrency: Set this to
1. Slow and steady wins the race.
3. Disable Video Transcoding
- Go to Settings -> Video Transcoding.
- Set Transcoding Policy to
Don't transcode any videos. Your phone can play MP4s just fine.
Conclusion

We took a 100GB “Dad Bod” library, put it on a WebP diet, mirrored it to the cloud, and locked it behind a geo-fenced firewall.
Now you can scroll through 10 years of memories instantly, for free, without worrying about storage limits. Happy hosting!